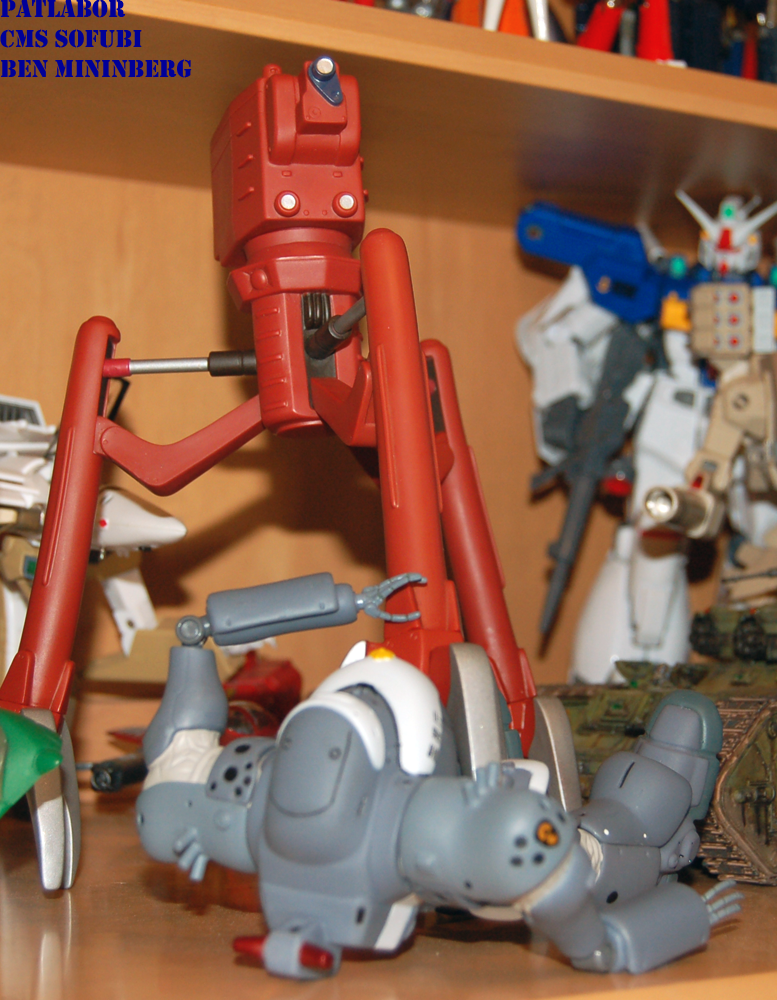
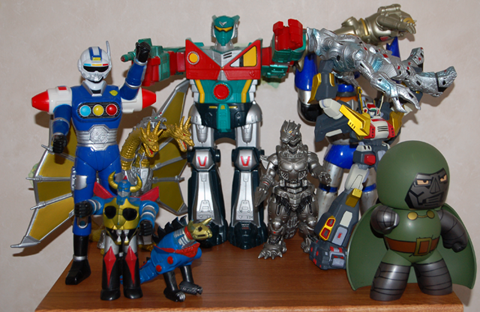
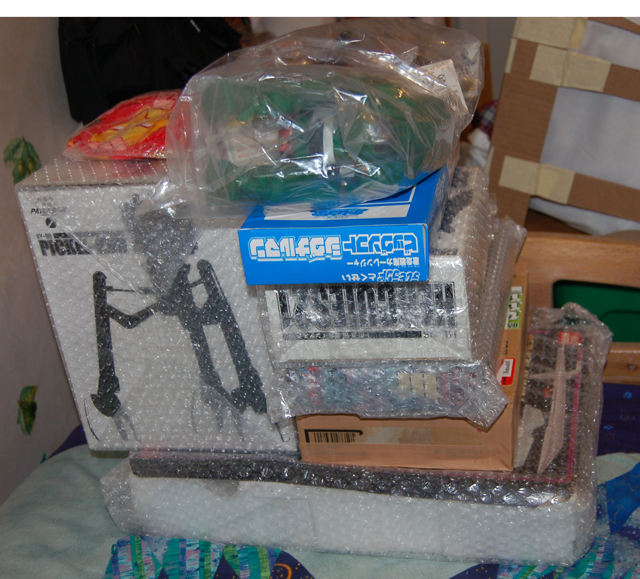
So I got a giant package in the mail today of stuff I’ve been collecting up from YahooJapan, and am slowly opening stuff. First up is the Big-Scale Takatoku Sasuraiger vinyl, along with Popy Gaiking and Daiku-Maryu, along with more CMs Corps Patlabor vinyls and a sentai Sofu…
Vintage Vinyls and More Toys Leave a comment

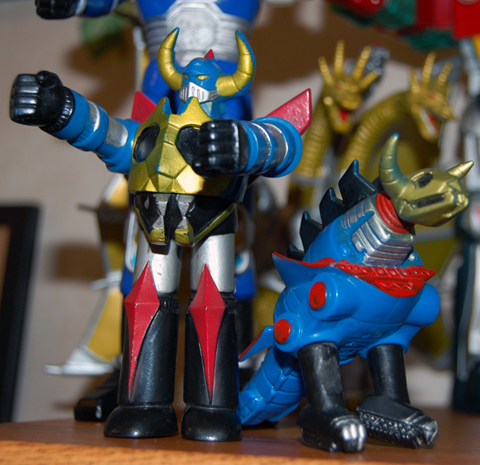

Jumbo Machinder Gaiking Leave a comment
I’ll start this off by saying that in addition to hosting my models as I finish them, I think I’m going to start using this for some more ‘bloggy’ purposes on whatever I’m thinking, most likely thoughts on toys as I’m posting them to other sites, or any other related things that come to mind. It won’t become a stream of conscious blather, but it is going to expand a bit.
For those who do not know, Shogun Warriors was a line of toys released in the States by Mattel using a number of Popy super robot toys, including some of the early Chogokins and early Jumbo Machinders, two foot tall polyethylene giants with various child-disabling launching mechanisms. Gaiking is among the SW Jumbo Machinder line, but when Mattel brought Gaiking over from the Popy line, they made some significant changes… the entire torso is an original sculpt, simplifying the multipart dragon face of the original, as well as making the Counter Cross weapons part of the shin mold instead of removable weapons. Like some of the other Mattel Jumbo Machinders, a shooting fist was added, adding a jointed elbow and asymmetry of the arms as well. The addition of the jointed elbow and firing fist (the fists are ENORMOUS for a firing projectile) are awesome, but the asymmetry and other lost features make the toy goofy looking. I found this oddball Gaiking on ebay by change, listed as a rare variant from Latin America, but more likely just a hack job done from parts by a collector that had two fists (and therfore two jointed elbows): I was sold… even with the goofy simplified torso, the two launching fists and jointed elbows make the a normally static looking figure into a fun dynamic behemoth. This is my first Jumbo Machinder, and I couldn’t be happier… I’ll definitely get more JMs in the future, but unfortunately have significantly more love for the later blockier design JMs, which are substantially more expensive, and therefore long-term goals.


Transformers Zone: Roadfire Leave a comment
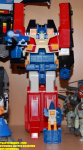
This is more of a ‘blog’ post than a display post, but I figured I’d throw it up here for people to see. I am a through and through TF fan and remember watching G2 on the TV. Fast forward 10 or 15 years, and now I’m into the hard stuff- Japanese G1. I got hooked up with a guy who helped me grab many of the easy to find stuff like Star Saber, Vic Leo, and Overlord for decent prices, and even found a Dai Atlas for cheap, and then overpaid for a boxed Sonic Bomber, but there was one sneaky bastard that eluded me: Roadfire C-349. On the TF wiki page, the caption under the picture of Roadfire reads “You’ll never own me”, and I took that as a challenge. RF’s not necessarily the most expensive G1 TF by a long shot, but damned if he’s not just about the rarest. Right when I was getting into the good stuff, I lost a loose incomplete broken RF for a whole bunch of money on ebay, and then did not see another one for almost a full year. Cut to about two weeks ago, and after a big binge of older super robot stuff on YHJ, I thought to myself ‘I should check ebay again for Roadfire…’ and there it was: boxed complete with unapplied stickers and some moderate yellowing. I had to have it… fortunately for me, the same seller was unloading a metric ton of good looking G1 stuff including other Japanese items, and it seemed to distract the competition, because I won RF for significantly less than my max bid with little competition in the critical last 5 minutes. The bugger showed up the other day, and I was in heaven… Reprolabels are in the air, and I’m going to look into the hydrogen peroxide method for the yellowing… here’s some love shots of the Zone base all setup (missing Sonic Bomber’s Micromaster… one more elusive piece of the set) and a shot of the three Powered Masters together, and a box pic of my JP G1 stuff so far.

Char’s Z’Gok G-Systyem MG Conversion 2 comments
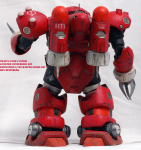
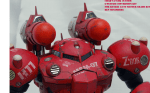
In the Universal Century tradition of Mobile Suit Gundam, ace Zeon pilot Char Aznable must have a special custom version ready of each and any mobile suit there is even a slim chance of that he might pilot. They must all be red as well, or Char won’t pilot them (Hyaku-Shiki does not count, as he was in disguise).
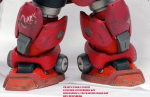
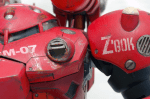
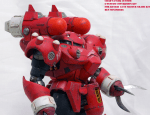
The Z’Gok is a Zeon aquatic mobile suit with formidable claws and hand-mounted beam cannons. The production model Z’Gok is stocky but not fat, with segmented flexible arms and legs like many of the other Zeon aquatic machines. This upgraded custom Z’Gok for Char’s use is a G-System resin conversion for the Bandai MG Z’Gok kit. The conversion is really designed for the Char’s use MG Z’Gok, as there are some slight differences in the joint-work of the arms and legs, but with a little extra putty work I was able to use the parts from a regular production Z’Gok MG kit without too much hassle. The casting was flawless, and the kit was well designed.
Thanks to the design of the Z’Gok and the kit, I was able to keep the model in well-thought out sub-assemblies for the painting process. I used my new Games Workshop Spray Gun to paint all the base colors, and tried Valeijo’s Model Air line of paints, which went on smooth, and has fantastic metallics. Weathering was done with acrylics and an oil wash… I did not do any dot-filtering, as I wanted to keep the weathering light, since the aquatic Mobile Suits were only used for a span of like five episodes in the show (if that). This was a first-issue of the conversion kit, so it included photo-etched metal parts for all the propeller covers. These went on easily and really added some scale to the machine, but I accidentally broke off two of the vanes on one of the front cover, which had to be bent into position, so I added a little battle damage around that area, and now you can see the weathering job I did to the propeller blades, painting them brass-colors and adding a patina like on real naval ships.


Mechabot: A Hero Reforged Leave a comment
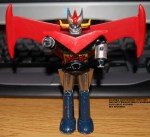
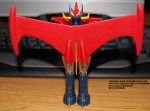
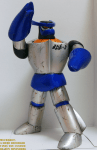
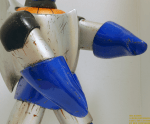
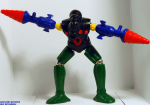
Ok, had a nice sunny day and was able to redo the photos for this guy. Mechabot: A Hero Reforged is a project by Go Hero, and is designed to capture all of the zaniness and classic funk of 70’s Super Robot shows, and Mechabot is the titular hero machine. Mechabot is equipped with the usual gamut of Super Robot equipment, including Super X1 Alloy Plating, Nova Ray Emitters, and the prominent Wing Blade. Mechabot is designed to combat a growing Sea Monster thread, so a lot of his design elements, like the shark-esque hands and wingblade fin draw from nautical inspiration, giving Mechabot a unique flair among similarly designed Super Robots. The Mechabot toy is a vinyl release with fantastic articulation for a vinyl toy, including cleverly cut hip, ankle, and elbow swivels that allow Mechabot to do a variety of action poses!
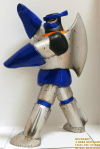
On to the custom… out of the bag, Mechabot is smooth sleek silver, with matte black and gloss metallic blue. I wanted my Mechabot to look a bit more ‘used’, and set to the task of adding variation and interest to this sleek design. When dealing with Super Robots, there aren’t a lot of panel lines, hard edges, or greeblie details to work with, so I decided to use color variation instead to add interest, much like when doing solid-colored tank models. The first thing I did was add a great deal of chipping and paint wear, using greys for the blue and black parts, and GW Boltgun Metal for the silver. I broke out the oil paints and started adding localized color filters of yellow ochre, multiple browns, black, white, and blue to all the silver surfaces, to get the worn metal weathering effect I was after. Acrylic paints were used to add rust spots, and oil paints were used to add rust streaking from the larger dings (I don’t really know if Super X1 Alloy rusts, but oh well). The oil and grease streaking were done with Tamiya and Valeijo Smokes… Tamiya’s is more black, and Valeijo’s is more brown. The Mechabot logo written in the Kanji (I think?) from the packaging was done with a super-fine brush and acrylics. From there I went to applying sealer, starting with a coat of Future first, so that I would have a nice neutral acrylic barrier between anything harsher and the vinyl underneath. From there I used clear finishes to add more interest to the different surfaces on Mechabot. The black parts were coated with dead flat artists’ matte varnish, and the silver metal bits were finished with Valeijo Satin. I left the blue bits Future shiny to make the metallic finish pop. I then went in and repainted many of the chips and dings in the blue bits and the rust spots I added to the silver with the matte varnish to add contrast to them.


Mechabot: A Hero Reforged Vinyl Custom Teaser Leave a comment
Mechabot: A Hero Reforged is an original IP vinyl toy designed by Go Hero. In the realm of designer vinyl toys, most are either made by pretentious twits, hideously ugly, or some combination therein. Mechabot bucks against this model, and is a gorgeous vinyl beast with great articulation and a stellar design. Out of the bag, Mechabot is a bit plain, and after playing with mine for a few days, I figured I could without too much fuss spruce him up a bit and make it look like Mechabot had seen his fair share of battles without being too overwhelming. I used a combination of paint chipping effects and a lot of subtle oil colors on the silver to add surface texture and variation to the armor, and a mix of finishes (gloss, satin, matte) to tie all the details together. This is a just a teaser shot, as I was unhappy with the table reflection the silver picked up in the rest of my photo shoot.

Some Vintage Toy Shots Leave a comment
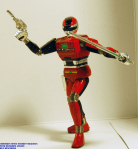
Just a couple shots… Popy Chogokin Space Sheriff Sharivan (red) with re-tightened ankles showing off his moves, and some Takara Magnemo fun with the reissue Jeeg I just got and the extra Baron Karza parts I got in a parts lot.


Yamato 1/60 Destroid Tomahawk Sticker Sheet Scan Leave a comment
Nothing special, just a decent-res scan of the sticker sheet from the Yamato 1/60 Destroid Tomahawk toy. My plan is to eventually make a decal sheet for the toy using these graphics as a starting point.
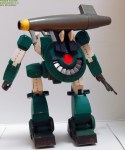
Bandai HCM Walker Galliar Leave a comment
Combat Mecha Xabungle/Blue Gale Xabungle is one of the early pioneer ‘real robot’ mecha animes. I haven’t actually see the show yet, but there is finally a fansubber out there working through the series, so eventually I will watch it. I have always been enamored with the mecha designs, and the toys thereof, especially the Walker Galliar and the Iron Gear. The Iron Gear is a massive transforming land ship, bristling with battleship features like a bridge and gun turrets, and is a toy on my wish list.
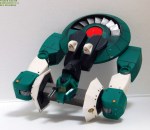
The Walker Galliar is one of the mecha deisgns that has a number of toy releases so it must have been a more important machine than the other side-designs that only ever got model kits. The Galliar consists of an armored futuristic pickup truck and a hovercraft, and the two combine and transform to form a robot. The Galliar is pretty much always depicted with its big goofy bazooka, and often an assault rifle and other random weapon situation depending. The ‘real robot’ nature of Xabungle means that every mecha design in the series is built for utility and function over looks and style. Even the Galliar has small gun turrets mounted on it, just like an armored fighting vehicle.
Bandai’s High Complete Model series is one of the staple 80’s mecha toy design lines, bridging the gap between model kits and toys. HCM models often have die cast metal parts and accessories that come on sprues and must be assembled like model parts. The HCM toys from the original line in the 80s included real robots and super robots, from Gundam to Raydeen, and featured excellent detail and articulation for the time. The HCM line’s spiritual successor in the HCMPro line started back up a few years ago with Gundam figures and are excellent as well.
The HCM Walker Galliar is 1/144 scale and features die cast feet and hip bar. The rest of the toy is plastic, and features fantastic articulation for the time, and only a little less articulation than the modern Soul of Chogokin Walker Galliar, which is about the same size. The little mounted gun turrets come on a separate sprue and must be attached to the figure, and the yellow details in the ankle rounds are stickers. I wanted to add a little detail to the figure, taking cues from the Real Robot Revolution Walker Galliar plamo kit by Bandai, adding some rivets and panel lines on the legs. I didn’t want to have to repaint the whole figure, so I did not worry about part seams and sprue marks on the figure, but just wanted to add detail and weathering to make a pretty figure that could still be played with. Weathering was made from my new favorite mix of Mig pigments, Tamiya weathering pigments, and paint washes. The tough thing was the balance weathering for robot mode and vehicle mode, so there is some overlap in weathering that applies to one mode and not the other, but really that makes sense for a variable machine.


Popy Chogokin GA-05 Great Mazinger Scramble Dash Scratchbuild Leave a comment
Popy is a now-defunct Japanese toy company who basically single-handedly started the die cast robot craze in the 70’s. The initial Chogokin releases were around 5 inch tall action figures almost completely made from metal, with shooting fists and some accessories. GA-05 is Great Mazinger, the successor bot to Mazinger Z, one of the grandaddies of the piloted giant robot genre. One of the defining accessories of Great Mazinger is the Scramble Dash flight pack, which retracts into Great Maz (somehow :P) as opposed to the Jet Scrander on Mazinger Z, which was a separate dock-able module.
I received this Great Mazinger chogokin in a mixed lot of Transformers toys, so it is likely a Shogun Warriors release, from when Mattel imported a mix of Japanese super robot toys to the US. The paint on the figure is pretty beat up, but the figure is intact and still tight, so I decided to make it my first fixer-up project, along with a number of others that are currently in the mail. I purchased reproduction fists online, but was unable to find a Scramble Dash anywhere, so I decided to just make one. I collected a couple of pictures from auctions online, and made the basic shapes from plasticard, with Green Stuff putty work for the wing tips and engine bodies. After that, it was just a lot of Mr. Surfacer puttying and sanding… and in reality, I probably could have done more sanding and smoothing work. The engine nozzles are Kotobukiya option parts.